Mikey has posted great videos about building the Trainer. They are very helpful and anyone who builds the plane for the first time, like I did, should watch them. However, he takes a few shortcuts I didn't take and I recommend not to take them. I already wrote about cutting out the plane. In this post I would like to write about things I did differently than Mikey.
1 Hinges
For me it was most convenient to make all the hinges right after cutting the three main parts out (I was wrong though, read below).
I made some mistakes, I've got my ailerons without nice tappered trailing edge but this probably won't hurt much. If it does, I can try to stich nice trailing edges later. Hey, this is foam board, right? I made hinges with 3M packing tape tape. I really can recommendt it. It's the cheapest way of making hinges and the tape sticks very well to the cardboard.
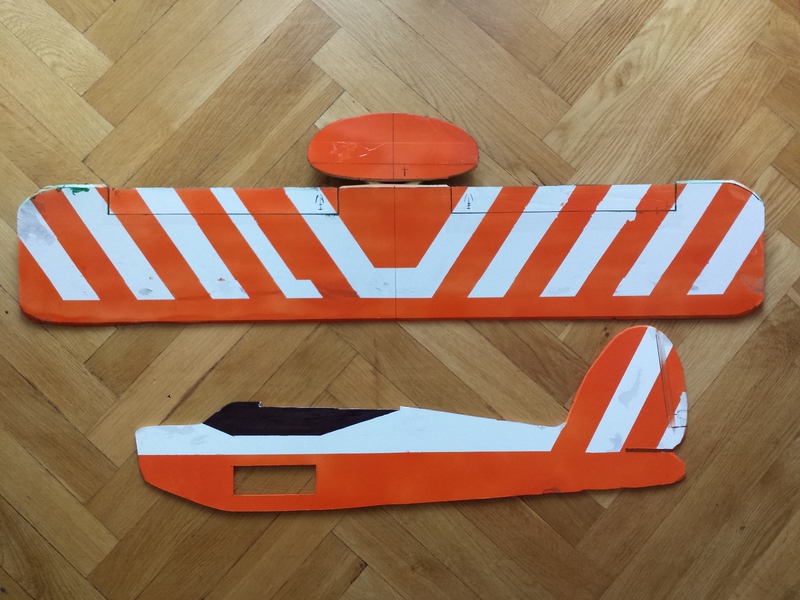
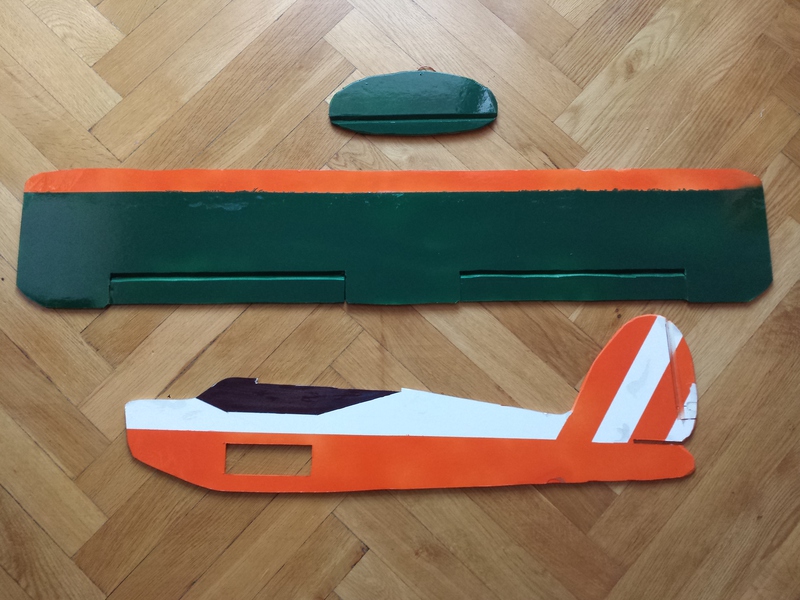
2 Painting
I painted the plane with orange (RAL 2004) and dark green (RAL 6005) Deco Color spray paints (4 € per 400 ml can). The orange paint is quite light and leaves any marks made with black pen on the foam bord visible. It definitely won't cover any other darker paint so put it before. The green one on the other hand is quite dark and thick. The paint sticks to the packing tape I used for hinges, however it is very easy to remove it with.
Note 1: Try if your masking tape is coverd with a glue that is weak enough not to tear holes in the cardbord covering your foambord.
Note 2: Paint the elements before cutting control surfaces and making hinges. Especially if you are going to use packing tape.
3 Push rods
According to Mikeys recommendation I bough Φ 1,5 mm hardened steel rod. It seems quite appropriate when I took it off the shelf in the hobby shop. I changed my mind the moment I tried to bend it. On one hand it is very flexible if you apply a force perpendicularly and quite stiff if you want to push something with it. On the other hand, it is fucking hard to bend and make a proper "Z" for control horns. The moment the first "Z" was almost ready I split the rod laterally to its length. I don't know how Mikey manages to make a push rod from 0.055" "Piano wire". I managed to make two for ailerons with a single bend on each end. I secured the ends with some thread soked with CA glue. And I gave up.
For rudder and elevator I decided to buy Φ 1,2 mm and Φ 0,8 mm rods and some Bowden tube. After testing both I decided to use the thicker one and used up almost the whole metre I bought.
Note 1: Do not use music wire thicker 1,2 mm for push rods!
Note 2: I used horns that do not go through the foam. Before attaching them to the control surfaces with CA I removed pieces of cardbord to make the horns stick directly to the foam.
4 Fuselage reinforcement
Although, I had got I bag of barbecue scewers to make some kites, I decided to reinforce the fuselage with a solid 5x5 pine slat all along its lentght. As you will find in the next post it was I wise choice. Hot glue was used as usual.
Note 1: You may want check the direction of the grain of a slat and make it perpendicular to the fuselage. It should be even stiffer then and harder to break (Am I wrong?)
Note 2: Watch out for popsicle sticks on the edge of the fuselage. If you stick them so they meet below the bottom front corner of the battery tray the fuselage may tend to break along the line between the corner and the point wher the sticks meet. Put some barbecue scewers there.
5 Motor mount
I made the motor mount almost exactly the way Mikey has designed it with two exceptions. As I worte before I couldn't find popsicle sticks so I decided to use 1,5 mm thick plywood for firewall. My uncle was so kind to cut it for me and drill holes. I attached the motor to it with M3 screws with nuts and washers facing backwards. I pushed the holes in the foamboard with the screws before putting the glue on the plywood. It appeard that the fuselage slat was too long and it blocked one of the screws so I cut a second foam square and stuck it between the the original motor mount and the plywood. Looks fine, works great.
6 Recommended order
- Cut out.
- Paint.
- Cut control surfaces out and make hinges.
- Attach control horns to control surfaces and servos on the wings.
- Stick a bent slat on top of the wings with some hot glue to make the dihedral, do not cover the slat with packing tape yet.
- Attach the reinforsing slat to the fuselage.
- Attach the elevator to the fuselage.
- Put tail servos and push rods in the fuselage.
- Attach the motor mount.
- Attach the battery tray with a piece of Velcro on it.
- Attach wings.
- Stick some Velcro to hold Rx and ESC. You might want to wait with it until now to see how far to the back (probably not very far at all) you can put these elements.